I've been selling vintage trim in my online shop for over four years now & I love hearing about how people use the trim they buy from me. I also love incorporating trim into my own sewing projects, so I'm always on the look-out for new ideas. I've been putting together a board of 'vintage trim projects & inspiration' over on Pinterest. I've found lots of things I want to try out. One of my favourites is for a handmade bookmark or strap to keep your journal/notebook closed. Really simple to create, but very useful & pretty to look at.

You will need:
Trim or ribbon
Hairbands (I used Ouchless hairbands from Goody)
Large button
Scissors
Needle & thread
Pins

The tutorial I found on Pinterest uses modern ribbon, but I'm a vintage-loving girl, so I've used vintage trim and a vintage button. I've used a piece of my woven fabric trim in mustard yellow & sage green. I think a wider trim makes a better bookmark/strap.
First cut trim to the length you require. For my A5 notebook, I've used approximately 19 inches (allowing extra for small hems each end). Obviously if you are making a strap for a larger notebook, you will need to use a longer length.
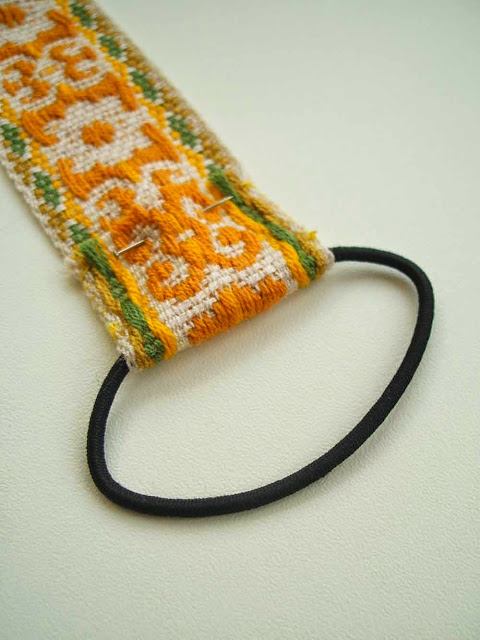
Then fold one end of the trim around the hairband & pin in place.

You can either machine-sew the end in place or hand sew. I chose to hand sew around the edges of the folded over section.
Once that is done, fold over the other end of the trim, pin and sew in the same way around edges to secure & neaten the end.
Finally sew your chosen button onto the front of the end without the hairband.
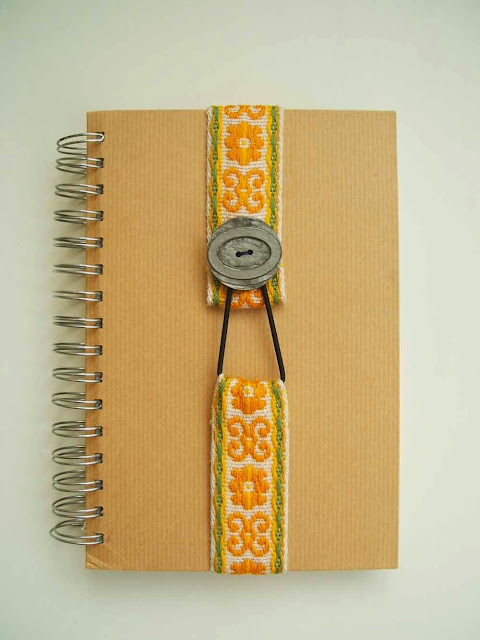
Once complete, wrap the trim around your book and hook the hairband around the button to secure in place.

And there you go, your handmade creation is now ready to be used as a bookmark or a journal strap.

Perfect for adding a personal touch to notebooks and journals.
And because they are so simple to make, you can whip up a few in your favourite trims & ribbons.

Follow Pouch's board vintage trim projects & inspiration on Pinterest.
I'm linking up with #brilliantblogposts over on honestmum.com and with Vintage Bliss Tuesdays, also Flaunt it Friday on Chic on a Shoestring Decorating blog, Frugal Friday over on Shabby Nest and My Best Post of the Week #MBPW over on britmums.com

That is really lovely! I want to make one actually! :)
ReplyDeleteOoh, I love this idea. I need to make one right away!
ReplyDeleteReally simple to make, can make a whole bunch of them! Just need to stock up on elastic hairbands...used my last one for this tutorial :)
ReplyDelete