
1) Bookmark for a journal, diary or sketchbook
I put together this tutorial on my blog a few months ago for a handmade bookmark or strap to use on your journal/notebook. This book strap is pretty to look at, simple to create and useful. The perfect way to personalise your books, journal or a sketchbook. I’ve used a piece of my vintage woven fabric trim in mustard yellow and sage green to make the bookmark in this photo

2) Embellish skirts and aprons
You could try adding vintage trim to skirts, tunics, patch pockets and aprons to name but a few. There are lots of examples out there, but I love this beautiful girl’s skirt via Hanna Purzel’s blog. You can also see more of her sewing projects over on Pinterest.

3) Embroidery Hoop Wall Art
I love embroidery hoop art. I know the trend has been running for quite a while now, but it doesn’t seem to be falling out of favour just yet. The great thing there is no limit to what you can add to an embroidery hoop. So grab some ric rac, ribbon, vintage trim, buttons and get to work with various embroidery stitches to create your own piece of unique textile art. This hoop from Little Bit Funkygives you a taste of what can be achieved.

I also love the hoop made with vintage fabric from Henhouse Homemade’s blog. Again, a mixture of fabric, vintage linens and trim would make a great patchwork hoop.

I’ve also spotted a book entitled “Hoop-La! 100 Things to do with Embroidery Hoops”. It’s high on my wish-list for books I’d like to own. Take a look at the Youtube video advertising the book to get a taste of what’s inside and to inspire you further.
4) Vintage trim belts
Using trim on a handmade belt is a great way to add a retro twist to your outfit. Perfect for adults and children. Take a look at this tutorial from Sew Very for reversible trim fabric belts. This idea is definitely on my to-do list…

5) Dog collars and leads
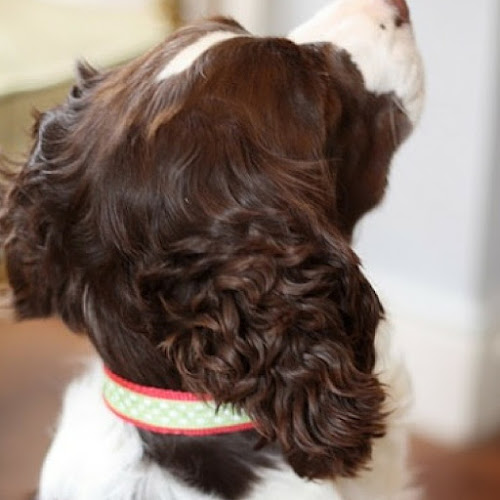
In a similar vein to belts, narrower trim can also be used to make DIY Dog collars and leads. Again there are lots of tutorials out there, here are a few of my favorites: Think Crafts, Totally Stitchin and Dog Paw Print.
6) Upcycled painted key necklaces or decoration.
This is another favourite of mine. Love the idea of combining old keys and vintage trim or ribbons to make an interesting display in your home. I would probably create quite a few to hang from hooks on a piece of driftwood. You could mix any combination of trim and key colours or you could stick to a certain theme to fit in with your home’s colour scheme. Take a look at Maize Hutton’s blog for further ideas.

Alternatively you can wear the keys as an interesting piece of upcycled jewellery. Take a look at Jessica in Your Ear’s blog post for more inspiration. Again the combinations of trim and key colour are endless.

7) Adding detail to a bandana
A simple way to add extra detail to a bandana or headscarf is to stitch some vintage trim or ribbon around the seam. I made this bandana for my daughter and added the trim to make a tie. There are lots of bandana tutorials out there, such as this one from Straight Grain and then adapt it with trim or ribbon of your own choice. Great for small children, bandanas tend to stay on a bit better than traditional sun hats. Also perfect for adults to give your outfit a folksy, festival vibe.

8) Crazy Quilts
I don’t really claim to be much of an expert on quilting. But apparently there is such a thing as Crazy Quilts and quite frankly I love them. This is a definition taken from crazy quilts on wikipedia.org:
“Crazy quilts differ from "regular" quilts in other ways as well. Because the careful geometric design of a quilt block is much less important in crazy quilts, the quilters are able to employ much smaller and more irregularly shaped pieces of fabric. In comparison to standard quilts, crazy quilts are far more likely to use exotic pieces of fabric, such as velvet, satin, tulle, or silk, and embellishments such as buttons, lace, ribbons, beads, or embroidery. Crazy quilting as a textile art is extremely creative and free-flowing by nature…”

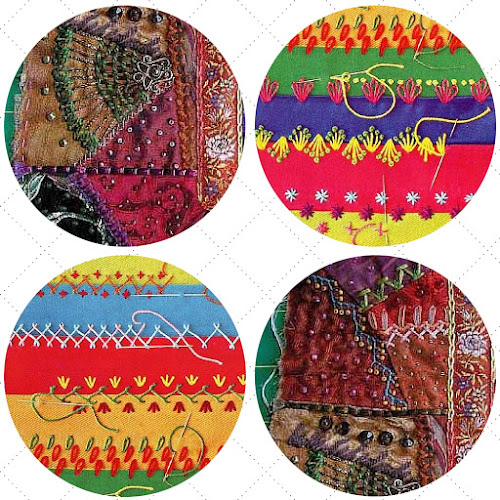
Some of my favourite examples come from Debra Dorgan, the creative mind behind All Things Pretty. I love the way she combines fabric and trim to create a riot of colour and texture. There are some beautiful examples over on Allie’s In Stitches blog. You can also visit indulgy.com to see a beautiful photo of a selection of stitches used in Crazy Quilting.
9) Add vintage detail to a cylinder lampshade
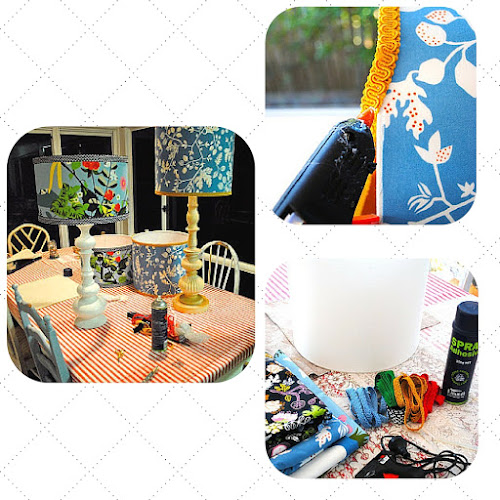
I have found through customer emails that one of the most popular uses for vintage trim is to use it to add retro detail to a lampshade. Take a look at this tutorial from Beach Vintage. It shows you a step-by-step guide to recovering a cylinder lampshade with fabric and trim. Just looking at it makes me want to grab a glue-gun and make a heap of lampshades for my home.
10) Create a naked or skeleton lampshade
Another take on the lampshade idea is to create a skeleton or naked shade. Quirky and unique, you can combine just about any fabric or ribbon for this project. The sky is the limit. There are some great examples out there, many use fabric scraps, but you could make one with a combination of fabric and trim.
Pursewna Pursewna creates a different twist on the naked lampshade by tying the fabric across the frame rather than wrapping it. Her original inspiration came from The Pleated Poppy. It’s worth taking a look at both blogs to get more ideas. The naked lampshades featured here are clockwise from top left: Dottie Angel; The Pleated Poppy; lystadsvingen.blogspot.com; Pursewna Pursewna

11) Ribbon hoop mobile decoration or garland
I’ve seen a few of these over the past few months and I think they would look great with a mixture of ribbon, fabric and vintage trim.
You can either make a mobile version using a hoop to hang from the ceiling. If you take a look at my vintage trim Pinterest board you can see people make many versions of hoops and wall hangings for children’s rooms, parties, weddings and the classroom. I think they are pretty, tactile and colourful. This is another project high on my to-do list. Take a look at this tutorial for a hoop mobile over on Shannon Berry’s blog. There are lots of wedding decoration ideas out there, try Brit + Co and A Low Country Wedding to see some pretty examples using ribbon, trim and fabric strips.

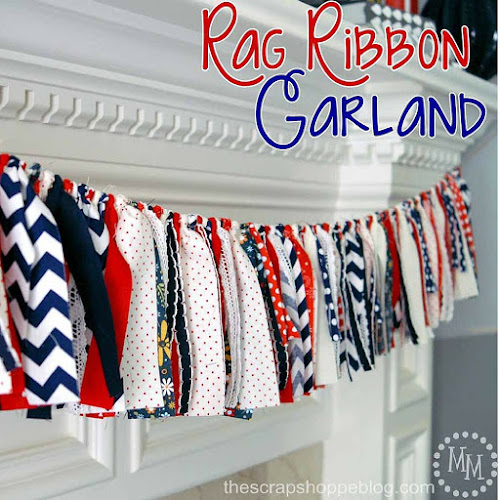
Another twist on the hoop idea is to create a garland. There is a great tutorial over on The Scrap Shoppe blog using fabric strips. I think it would be interesting to add trim and ribbon into the mix. This is a lovely no-sew project, so could easily get children involved with making one.
12) Fairy Lights
I first saw fairy light like this on a stall at Lou Lou’s Vintage Fair in Bristol a few months ago. I was peering at the lights and realised they were made with covered plastic shot glasses with fairy lights threaded through. There are oodles of tutorials out there. The top two photos in the image below are from Ruususuu and use paper cups. There are more ideas over on itsamakkie.blogspot.co.uk and rebeccasdiy.blogspot.co.uk. You can combine vintage fabric on the shades and then add trim or ricrac along the edges. Again the combinations are endless and they look amazing hanging from a fireplace or bookshelf.

13) Christmas Stockings
A friend of mine gave me a lovely collection of vintage trims a couple of years ago. I had been waiting for inspiration to come to me and I hit on the idea of making felt Christmas stockings with trim detailing. They are simple, but effective and the trim is so festive. I'm really pleased with the way they've turned out.

14) Fabric, yarn and ribbon wreaths
Yarn wreaths have become incredibly popular recently. Alongside yarn, wreaths can be made with vintage fabrics, ribbon and trims. Katie Runnels, the creative mind behind The Constant Gatherer makes some of the best examples I’ve seen.
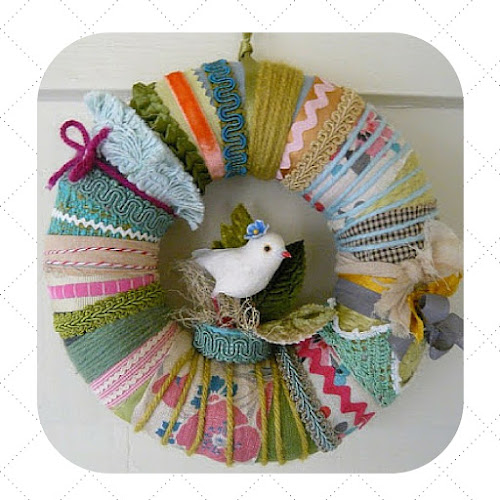
There are heaps of wreath tutorials out there. I’m particularly in love with this vintage fabric sheet version from In Colour Order. It would be nice to add some vintage trim or ribbon into the mix to add extra retro detail.

15) Embellish a bag or purse
I’m a big fan of bags, especially totes. So a tote combined with vintage trim ticks lots of boxes for me. It’s no wonder I fell in love with this bag featured on the Lola Nova blog. Grab the Carryall Bag pattern from Fabenmix and add your own modification and embellishments.

Another lovely example is this purse from Karen Meyers made from a repurposed wool jumper with vintage trim detailing. It is featured on the Grains of Earth blog post – 18 ways to upcycle old sweaters.

Follow Pouch's board vintage trim projects & inspiration on Pinterest.
I hope you have enjoyed my list of creative ideas and uses for using trims, ribbons, fabric scraps and haberdashery gubbins. Please head on over to my Pinterest board for further inspiration. The projects included in this blog post are for personal crafting use. Please do not employ for commercial use unless the specific tutorial gives permission for this. I have made a great deal of effort to credit all the designs featured here. If you share this post, please take the time to credit their hard work. Thank you & happy crafting!
I'm linking up with The List over on youbabymemummy.com


3 comments:
Such beautiful pictures! very inspiring
Oh what joy, looking at pretty things to do with pretty fabric - a heavenly few minutes just spent reading this post...just what I needed after a long day :)
All so lovely , I especially love the skirt . I can vouch for that book Hoopla I have it & love it.
Post a Comment